
When the shovel stops making progress
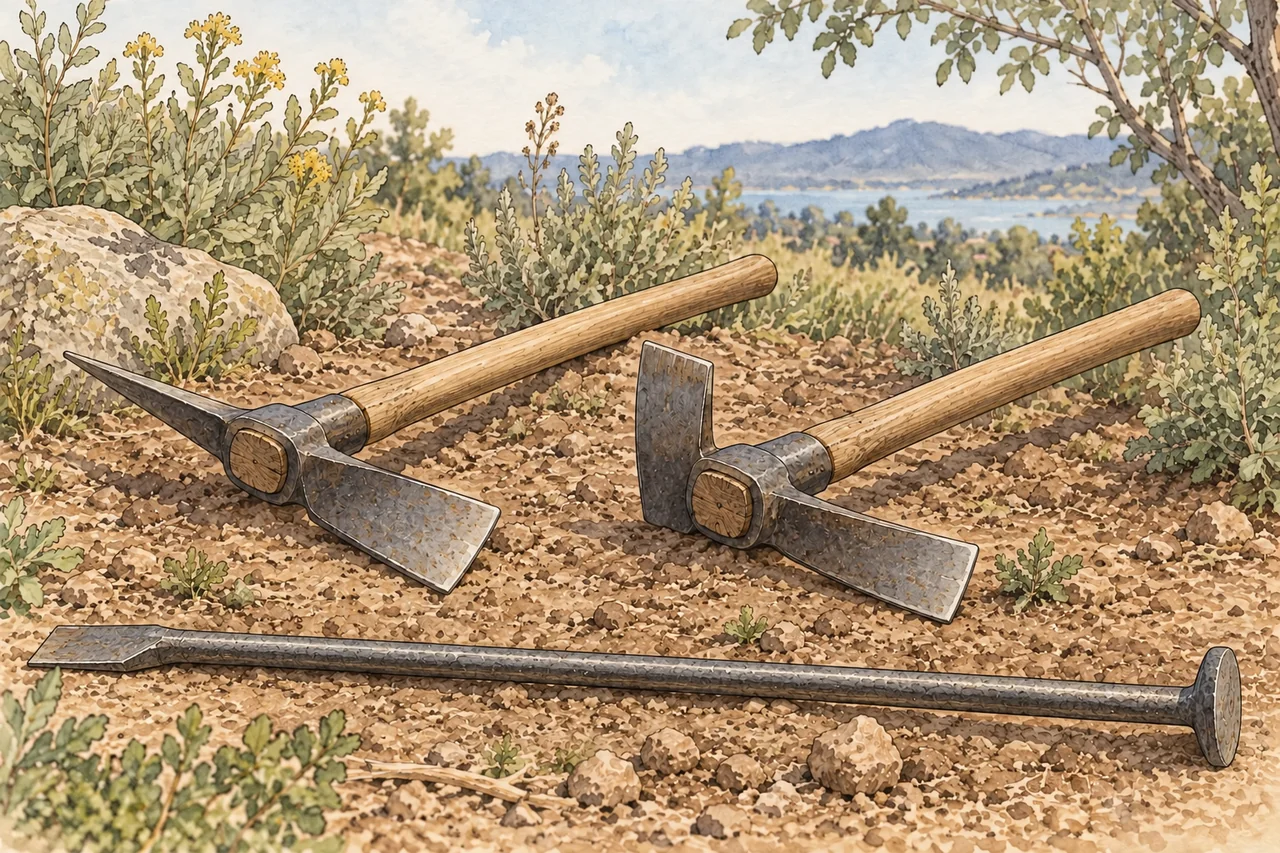
If a shovel repeatedly bounces off the ground, pushing harder is not always the useful next move. The soil may need loosening, a root may need a different approach, or a stone may need to be worked around. Picks, mattocks and bars solve different parts of that problem.
Make the buried-service check before using any of them. A pointed tool concentrates force into a small area. It is not an exploratory probe for an unknown pipe or cable.
For ordinary small jobs, think in stages: loosen a manageable piece, remove the loose material, and inspect the newly exposed ground. That is more controlled than trying to break, pry and shovel with one tool.
Pick mattock, cutter mattock or grub hoe?
A mattock has a head mounted across its handle. Its broad grubbing blade is arranged like an adze, with the cutting edge across the direction of the handle. What sits at the opposite end distinguishes the common types.
| Tool | Head shape | Typical role |
|---|---|---|
| Pick mattock | Pointed pick opposite a broad grubbing blade. | Breaking compacted ground, working around stones and loosening material. |
| Cutter mattock | Vertical axe-like cutter opposite the grubbing blade. | Grubbing and cutting roots where their removal is appropriate. |
| Pick or pickax | Commonly a point opposite a narrower chisel end. | Concentrating a strike into hard material. |
| Grub hoe | Broad, sturdy hoe blade. | Loosening soil and pulling it toward a cleared area. |
Regional names overlap. The Forest Service's 2025 trail notebook illustrates both mattock types. Truper's current range also separates pick and cutter mattocks. Inspect the head if a listing simply says “pick.”
The heaviest available head is not automatically the right choice. A tool that you can control through a small, accurate stroke is usually more useful for careful work than one that makes every swing a commitment.
Use controlled bites
Clear the work area and give everyone enough distance from the full tool swing and flying material. Wear sturdy footwear and appropriate eye protection. Inspect the handle and head attachment before starting.
On clear, verified ground, begin with short strokes at the edge of the area you are loosening. Take shallow bites and clear the loosened dirt. Leave room for the next piece to move. The Forest Service's hand-tool manual favors short, controlled chopping with grubbing tools instead of large, tiring swings.
Keep your feet and legs out of the strike path. Stop to reposition rather than stretching toward a difficult spot. If a head loosens, the handle cracks, or chips start flying unpredictably, stop using the tool.
Do not assume a mattock will break every rock. A loose stone, a weathered seam and a continuous mass of hard bedrock are different problems. Repeated impacts with no progress are a reason to change the method or get help.
Roots deserve a separate decision. Removing a small unwanted plant is different from severing roots belonging to an established tree. University of California guidance explains that root injury and soil disturbance can weaken trees. Get advice before digging through their important root areas.
A digging bar is not always a pry bar
A digging-and-tamping bar commonly has a chisel end for loosening material and a flat end for packing it. A rock bar or purpose-built pry bar is intended for levering. Similar appearance does not establish interchangeable strength.
This is an important distinction in both the older Forest Service hand-tool manual and its 2025 notebook: digging-and-tamping bars are not presented as rock-prying tools. Seymour Midwest likewise lists different bar categories, including tamping and pinch-point bars.
Read the manufacturer's intended use. Use a suitable prying tool only with stable footing, a secure bearing point and a plan for where the object could roll or drop. Keep hands and feet out of crush points. Do not put a bar between your legs or improvise a longer handle to force a stubborn object.
For a post hole, a narrow bar may help loosen a verified obstruction that a clamshell digger cannot bite into. Remove the loosened pieces with the digging tool. If the hole needs to become much wider to extract a rock, reconsider how that change affects the post installation.
Maintenance matters before the first swing
A loose head is a reason to stop, not a reason to swing more gently. Repair the assembly according to the maker's instructions. Check wooden shafts for splits and splinters, and inspect other handle materials and metal heads for damage too.
Clean and dry the working surfaces after use. Where sharpening is permitted, preserve the factory profile. Do not grind a pick to a needle point or copy a sharpening angle from a different tool. Secure the head, use the right equipment and protect your eyes.
Impact tools with mushroomed striking heads can shed fragments. OSHA identifies this defect in its hand-tool standard. Also check whether your particular bar is intended to be struck at all. A flat tamper end does not necessarily make it a hammering surface.
An old fence-building lesson
Herbert A. Shearer's Farm Mechanics (1918) pictured a scoop for removing stones from post holes and a separate steel crowbar for loosening them. The illustration captures an enduring idea: freeing material and lifting it out are separate jobs.
Bailey's Manual of Gardening (1910) also discussed using a spade and pick together. We can retain that division of labor while following current tool instructions and service-location practices. Old drawings make good history; they do not certify a modern tool for an improvised use.
Choose the tool for the resistance
- Compacted ground: consider a manageable pick mattock or suitable grub hoe.
- Roots approved for removal: consider a cutter mattock, or another appropriate cutting tool.
- A confined hole: a suitable narrow digging tool may loosen material for the digger to collect.
- A heavy object that needs levering: use a bar designed for prying, with a safe movement plan.
- Unknown services, unstable ground or rock beyond the tool's capacity: stop and reassess.
The useful upgrade is the right working end, not simply a harder swing.
Sources and further reading
- L. H. Bailey, Manual of Gardening (1910)
Historical use of a spade and pick as complementary tools.
- Herbert A. Shearer, Farm Mechanics (1918)
Historical illustrations of separate stone-loosening and post-hole clearing tools.
- USDA Forest Service, Handtools for Trail Work (2005, updated 2012)
Mattock types, controlled strokes and the distinction between digging and rock bars.
- USDA Forest Service, Trail Maintenance and Construction Notebook (2025)
Updated mattock illustrations and limits on digging-and-tamping bar use.
- Truper, 2.5 lb Pick Mattock
Manufacturer example of a pick mattock with a pointed working end.
- Truper, 5 lb Cutter Mattock
Manufacturer example distinguishing a cutter mattock from a pick mattock.
- Seymour Midwest, Striking Tools
Separate tamping and pinch-point bar categories.
- OSHA, Hand Tools 1926.301
Loose heads, damaged handles and mushroomed impact-tool heads.
- Before You Dig Australia, For Homeowners
Service-location checks before using pointed digging tools.
- University of California IPM, Protecting Trees During Construction
Why root removal around established trees needs a separate assessment.
- CCOHS, Landscaping: General
Protective equipment, inspection and safe landscaping work areas.
- HSE, Construction Manual Handling
Matching equipment and work organization to the physical demand.
- Royal Horticultural Society, Cleaning Hand Tools
Cleaning and drying tools before storage.