
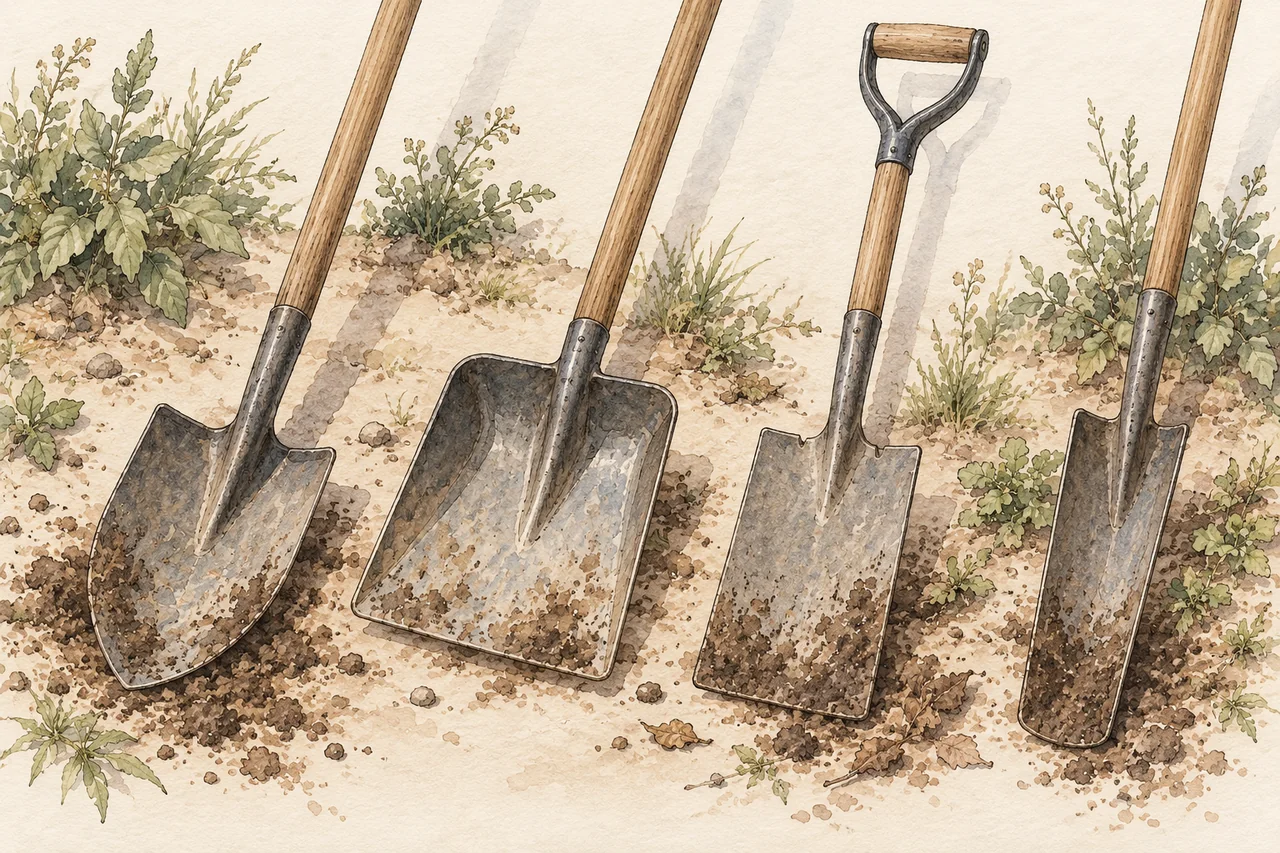
Look at the blade before the name
A shovel can dig, and a spade can move dirt. The difference is which job each shape makes easier. Names vary between countries and manufacturers, so a product labeled “shovel” may have the flat blade another seller calls a spade.
Start with three questions. Does the edge need to cut into undisturbed ground? Does the blade need to hold loose material? Does it need to fit a narrow space? Those questions are more useful than choosing the largest tool on the rack.
The Canadian Centre for Occupational Health and Safety identifies tool weight, handle design, length and blade shape as important selection factors. A tool should suit both the task and the person holding it.
Which tool does which job?
| Tool | Useful for | What to check |
|---|---|---|
| Round-point shovel | Opening ordinary ground and lifting loosened soil. | A pointed edge, dished blade and usable foot tread. |
| Square-point shovel | Scooping loose soil, gravel or sand from a pile or firm surface. | A straight edge and bowl that carries the material without an excessive load. |
| Garden spade | Cutting turf, defining bed edges and taking controlled slices of soil. | A relatively flat, rectangular blade and comfortable stepping surface. |
| Trenching shovel | Removing loose material from a narrow excavation. | Blade width and angle, plus room to operate the handle. |
| Drain spade | Reaching into confined areas and taking narrow cuts. | A long, narrow blade. It may not scoop like a trench-cleanout shovel. |
| Spading fork | Loosening established garden soil and lifting some rooted material. | Strong digging tines, rather than a light pitchfork designed to move hay. |
| Manual post-hole digger | Gripping and lifting soil from a small round hole. | Working hinges, sound handles and room for the handles to open. |
These are overlapping categories. Seymour Midwest's range, for example, separates garden spades, drain spades and trenching tools. Compare the actual head rather than assuming every narrow shovel does the same work.
Two complementary tools can beat one heavy tool
For opening a modest bed in ordinary soil, a garden spade or round-point shovel is a sensible starting point. For moving a pile of loose material, a square-point transfer shovel usually earns its place. AMES describes its square-point model specifically as a tool for transferring loose soil and materials.
If the soil needs loosening first, consider a spading fork in suitable garden ground. Oregon State University Extension distinguishes loosening with a fork from turning the bed with a spade. You do not have to invert every layer simply because you own a digging tool.
In hard or rocky material, separate breaking from scooping. A suitable mattock or bar can loosen the obstruction, leaving the shovel to remove what is already free. Shovel handles are not substitutes for rock-prying bars.
A narrow tool is useful only while you can control it and remove its load. A trenching blade does not remove the need for service checks or safe excavation planning. Do not enter an unsupported excavation to give yourself a better working angle.
Choose a handle that fits your movement
A long handle can reduce bending during some tasks and give room for two separated hands. A shorter handle or D grip can be convenient for close work. Neither is universally best. Hold the tool as if you were cutting, lifting and placing material, not just carrying it out of the store.
Check that the grip is comfortable with the gloves you use. Look for a foot tread that distributes boot pressure rather than presenting a thin edge. Make sure the blade and handle meet securely, and that the shaft is not damaged.
Wood can be comfortable and, on some tools, replaceable. Fiberglass and steel are common alternatives, with different weights and construction. Judge the assembled tool. “Heavy duty” on a label does not tell you whether you can comfortably repeat the movement for your whole job.
A smaller blade is worth considering for dense or wet material. A big scoop collects a big load, even when your arms have stopped appreciating the bargain. The best capacity is one you can place under control.
Keep a good tool working well
Before use, check for cracked or splintered handles, loose heads and damage at sockets or welds. Retire a damaged tool until it can be properly repaired. OSHA's hand-tool standard specifically calls for sound wooden handles and tight tool heads.
After use, brush off soil, wash stubborn mud if needed, and dry the tool before storage. Follow the maker's directions for corrosion protection and handle care. Leaving a spade wet under a pile of dirt is an avoidable test of its materials.
For a sharpenable cutting edge, preserve the manufacturer's bevel and secure the tool while filing. Use a handled file suitable for metal and appropriate eye protection. The RHS sharpening guide covers cultivation tools. A useful edge need not be a razor edge, and different blade designs need different treatment.
The old manuals noticed the same things
Rockwell's Home Vegetable Gardening (1911) advised buyers to examine a spade's handle attachment and how it felt in use. Bailey's Manual of Gardening (1910) illustrated specialized narrow tools for ditch work alongside familiar spades and forks. Both books show that matching shape to task is an old idea.
Their recommendations belong to their period, but the buying lesson holds up: inspect the joint, notice the balance and understand the head. You are buying a repeated movement, not just a piece of steel.
A sensible starter kit
For occasional digging, begin with a comfortable digging shovel or spade, suitable gloves and boots, and a way to move the soil. Add a transfer shovel when moving piles becomes a regular job. Add a fork, mattock, trenching tool or post-hole digger for a specific need.
Borrowing a specialist tool for one project can teach you more than buying several on speculation. Once you know which part of the work is difficult, the next tool choice becomes much clearer.
Sources and further reading
- L. H. Bailey, Manual of Gardening (1910)
Historical illustrations of spades, forks and specialized narrow tools.
- F. F. Rockwell, Home Vegetable Gardening (1911)
Historical advice about spade attachment, fit and balance.
- CCOHS, Shovelling
Blade shape, tool weight, handle design and length.
- CCOHS, Landscaping: Shovelling and Digging
Tool choice, stable movement and the extra demand of wet soil.
- USDA Forest Service, Handtools for Trail Work (2005, updated 2012)
Shovel shapes, separating loosening from lifting and proper tool use.
- Oregon State University Extension, An Educator's Guide to Vegetable Gardening
Garden spades and forks, including loosening without always inverting soil.
- AMES, Shovels and Scoops
Manufacturer categories for digging and transfer tools.
- AMES, Long Wood Handle Square Point Shovel
Square-point transfer shovel construction and intended material-moving role.
- Seymour Midwest, Shovels and Scoops
Distinct garden spade, drain spade and trenching tool categories.
- Royal Horticultural Society, Cleaning Hand Tools
Removing soil, drying and protecting hand tools during storage.
- Royal Horticultural Society, Sharpening Hand Tools
Secure filing and preserving an appropriate edge on cultivation tools.
- OSHA, Hand Tools 1926.301
Tight heads and sound wooden handles.